Showing posts with label cookies. Show all posts

Wednesday, November 30, 2011

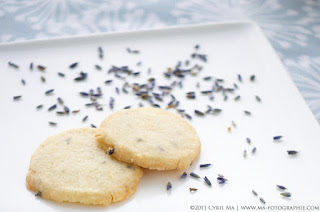
Lavender Shortbread

This holiday season I partnered with the owner of a pop up store to sell my lavender shortbread at her lavender store. These shortbreads are crumbly with a pleasant scent of edible lavender and a hint of lemon. Great to enjoy them with a glass of milk or a cup of afternoon tea.


Sunday, September 18, 2011

Little White Mountains

This past week was a marathon to me. I couldn't believe I survived. My architectural work has taken the most out of me and I am so exhausted! I miss my kitchen so much!

Not sure why I got myself into this, but I actually had to work on both weekends as well. It's such a nice day outside and I'd rather do something enjoyable than work. To try to balance out my life and probably try to keep my sanity, I scheduled myself a hot pot dinner and spared some time to bake something. Having time to bake or make food is a real treat for myself.

I picked this recipe mostly because of the preparation time it is involved. I have never seen such an easy recipe before.

Coconut Macaroons
(Recipe adapted from The Fundamental Techniques of Classic Pastry Arts from the French Culinary Institute, slightly altered to fit for everyday home baking.)
Ingredients (makes 8)
105g shredded coconut
52g sugar
35g egg white (from 1 large egg)

Method:
Preheat oven to 265F. Line a baking sheet with silicon pad / parchment. Combine all ingredients and mix well.
Using a spoon or a small ice-cream scoop, compact the mixture into 8 tightly packed pyramids and line them apart on the prepared baking sheet. Bake for 20 minutes or until the edges are lightly browned.  Leave them on the baking sheet for several minutes before transferring to the cooling rack to cool completely. Store in an airtight container and consume within 2 days.

Sunday, May 1, 2011

Do You Like Things Round?


My good friend and roommate is getting marry this summer! I am so happy for her and really want to make her something for the wedding.

I had volunteered to make her wedding favours and she gladly accepted the offer! I proposed a few options to her and we had decided to make her snow ball cookies. "I like things round," she said.

These little round things might not look like snow balls, but the name actually describes the texture of the cookie. To be more descriptive, these resembles short bread, but have a looser texture. These delicate goodies disintegrate in your mouth and it's not too sweet. You can make the cookie dough ahead of time and bake as much as you need, although they are so good that they will disappear from your cookie jar in no time.


These are the 4 flavours I prepared for sampling: chocolate, hazelnut, pistachio and coconut. I have based my recipe from this chinese blog, and polished the recipe a bit to enhance the flavour and texture.

I am only putting one basic recipe here. Depending on the weather, your ingredients and your taste preference I encourage you to fiddle with the recipe to suit your liking. Happy baking!


Chocolate Snowball Cookies
(Makes 14 cookies)
45g butter, room temperature
a pinch of salt
15g icing sugar
25g ground almonds
45g cake flour
10g cocoa powder

1. Mix butter, salt, icing sugar, ground almonds and cocoa powder together.
2. Sieve the flour and add to the mixture. Mix until just incorporated.
3. Roll into a log and rest it in the fridge overnight to firm up the butter.
4. Divide the dough into 10g portions and roll into little spheres. Line them up on a silpat/parchment paper tray and put it back in the fridge while you preheat the oven to 325F/170C.
5. Bake for 15 to 20 minutes. The cookies should feel a little bit of give when they are ready, but strong enough to hold the shape.
6. While they are still hot, sieve a light coating of icing sugar on top. Cool down and sieve another coating.

Sunday, March 20, 2011

Cookies for Charity

Volunteered to donate some cookies to raise money for Japan. Made 3 designs: wish packets and sakuras (cherry blossom).


I used a wet on wet method to pipe these cookies.


I also did a test 3D design but didn't end up in production due to time constrain.


Piping 60 cookies by myself wasn't easy. Glad I had a companion to get me through a long night. Here's what my companion did while I was working on my cookies:

4 hours of piping in 30 seconds.

Thursday, February 17, 2011

Make that Bacon Please!

Bacon in a cookie?

Why not?

After the Valentine's day flower pot cake, I am taking up another challenge: to develop a savour wedding favour. While brainstorming online yesterday I found this bacon pistachio cookies recipe. Interesting pairing. I have heard maple bacon, chocolate bacon, and the infamous bacon strips feast on youtube, so I wasn't too surprised when I stumble across this recipe. I checked my pantry and freezer and have all the ingredients, and off I go.

This recipe is very easy to make. I actually use the microwave method to crisp up my bacon, so there's minimal clean up on my stove. These cookies also keep very well in the fridge for unexpected guests. Here is my adaptation of the recipe.


Bacon Pistachio Cookies
(adapted from Angie's Recipes)

Ingredients
  • 50 g Bacon
  • 120 g Butter, cut into small pieces
  • 60 g Caster sugar
  • 1 egg (I replaced the egg white with an egg, just because 1 large egg is approximately 50g, and I already have more than enough egg yolks in my fridge to be dealt with)
  • 200 g Pastry flour
  • 1/2 tsp Dried thyme
  • 50 g Pistachio, roughly chopped
  1. Crumble up and loosely flatten a kitchen paper towel and put it on a flat plate. Line up bacon on top of the paper towel.  Cover with extra crumbled paper towel and microwave on high at 30 secs intervals until fully cooked and crisp. Flip bacon and paper towel as necessary. Dry them in a paper towel and roughly chop.  Set aside.
  2. Cream the butter and sugar until light and fluffy. Beat in the egg until combined. Add in the pastry flour, dried thyme, bacon and chopped pistachio. Work the mixture until it comes together. Roll the dough into a log at about 5cm in diameter. Wrap the log with cling film so that the dough is completely covered. Chill the dough for at least 2 hours or overnight until thoroughly firm.
  3. Preheat the oven to 175C/350F. Line two baking trays with paper or silicon mat. Remove from the fridge, and slice the log into cookies, about 5 to 7 mm thick. Place the cookies on the prepared trays and bake 15 to 18 minutes. Cool the cookies on wire racks. Stir them in an airtight container for at least a week.

Monday, December 6, 2010

Tis The Season to be Baking

Christmas isn't Christmas without lots of food and gathering of friends and families.
Cookies are staples for bringing up the holiday spirit. This past weekend I have made a 3D Christmas tree, with my favourite basic vanilla cookie dough and decorated with icing, silver candies and gum drops.


It is nice to find a basic cookie dough recipe and adapt it on your own. Cookie doughs are generally very versitile and can be frozen for at least a month. For this holiday season I have made a batch of vanilla and a batch of chocolate cookie dough to stock up for unexpected guests and visitors (or maybe for night snacks - such an evil thought). I have divided the doughs into small portions, wrapped them in plastic wraps and in freezer bags, so I can always defrost a small amount ready to be baked.

With the same batch of dough I have also made stained glass cookies for ornaments for my mini Christmas tree. These stained glass cookies are super easy to make; all you need is some hard candies. First, roll out your basic cookie dough into 1/8" thick and cut to desired shapes with your favourite cookie cutters. Par-bake them on a baking sheet lined with parchment or silicon mat. Using a cleaver, cut hard candies in half to about the size of peas. After the cookies have been in the oven for about 5 minutes, the cookies should be able to hold its shape. Drop the candies within the cut out and bake for the remaining time. Leave the cookies to cool before removing from the silicon mat.

Note: you do not have to cut the candies too small. In fact, cutting them too small will result in bubbles in the "glass". You can always add more candy if you see there are holes in your cookies.


Tuesday, August 3, 2010

Daycare


I made these cookies for my friend to celebrate her new born baby.  These are basic vanilla cookies with royal icing. According to my friend and her husband they tasted great! The two of them finished the 20 cookies within my 48 hours of visit! I ended up making a second batch at 11pm on Monday night for their party next Saturday.


The royal icing has to dry before piping melted chocolate for the eyes and nose. By the time I finished icing it was 3:30am, and I took a short nap and woke up at 5:30am again to pipe the chocolate. I put them in the fridge to speed up the chocolate to set. I opened the fridge in the morning and there were 77 little smiling faces looking at me. That made my sleep deprived day so much better.

LinkWithin

Related Posts Plugin for WordPress, Blogger...