Showing posts with label Cake. Show all posts

Sunday, April 7, 2013

Here Comes the Train


Couldn't believe time flew by so fast it seems like I just did Adrian's first birthday cake not too long ago.

Adrian loves Thomas the Train and here it is in cake form! Thomas is hand crafted with sugar paste. Do you like him?


The biggest challenge for this cake is actually the cake itself. Turns out that the little boy has quite a few allergies and had to stay away from eggs and dairy products. The cake needed to be made of natural sugar as well. If you know a little bit about baking you will know that eggs, butter and sugar gives structure, fluffiness and flavour to cakes. So yes this cakes contained none of those ingredients! I didn't have any experience in vegan baking and I was lucky to find a really nice vegan gluten-free chocolate cake recipe to start with and changed it to a vegan refine-sugarless version. Since most cake fillings and buttercreams has both butter/dairy and lots of sugar, I substituted with dairy-free chocolate soy ganache.

To recap, that is no butter, no eggs, no refined sugar, no vegan butter, no egg substitute and no splenda. The cake was surprisingly fluffy with subtle sweetness. I still prefer regular cakes but it's hard to tell the cake contained none of those ingredients if I didn't tell you before hand.

What will Adrian's third birthday cake look like next year?


Tuesday, August 23, 2011

Princess Ariel

Hi I am still here! I had just spent a wonderful week on the west coast with lots of good friends, great food and celebrated with lots of wine. It was maybe a bit too much fun which took me another week after to sync myself back to reality. Boo, that wasn't fun at all.

To lift my spirits, I have decided to tackle something that I have been wanted to try for quite a while - practicing fondant and make a doll cake.  I have learned and practiced fondant techniques on a few dummy cakes, and I wanted to try it on a real cake to get a feel of it.


And this is what it looked like.

"What did you mean I forgot to take pictures of the cake?" That was my reply to C when he downloaded the pictures and said he couldn't see pictures of the cake. But you are looking at the cake, hon!

The dress of Princess Ariel was made of a soft and dense dark chocolate cake, 5 layers in total, with vanilla buttercream and strawberry jam. It was then covered with marshmallow fondant. I also made the bodice with the same fondant too. You can find the recipe of the marshmallow fondant here.

This is my first time working with marshmallow fondant. I want to test with the basic recipe and therefore decided not to add colour to it. Now that I have worked with the consistency, next time around I can try adding colour and texture to take it to another level. Well next time!

Monday, May 2, 2011

Make it Spicy!


Up for a challenge for imaginative flavours?

Here's JollyMommy's birthday cake I made for her this year. Very innocent from the outside, but you would never imagine what flavour it is: tom yum white chocolate mousse cake!

Both of us saw this cake recipe on Tony Wong's recipe book and was very curious what the flavour combination will be like. JollyMommy's birthday is a good excuse to try it out!


The cake consists of a basic sponge cake and a white chocolate mousse flavoured with tom yum spices. The tom yum spice is made of lemon grass, kaffir lime leaves and ginger. I have also added a red chili to the mousse, which the original recipe didn't call for. The ginger taste came in pretty strong, a little bit over powering the lemon grass and kaffir lime flavour, which makes the cake taste similar to my previous lemon ginger mousse cake. The red chili is a nice touch. Due to milk's natural characteristics to neutralize hot and spiciness, much of the heat is subdued but only kicks in at the end of tasting.

You can find the recipe in Tony Wong's book. Add 1 rough chopped red chili to the tom yum milk recipe.

Tuesday, April 5, 2011

A New Challenge


I have always wanted to have an opportunity to make a multi-tier cake. It's not that often to have such a big event that has enough people to consume a big cake. When a friend of mine asked me if I would like to make a cake for 60 people last Saturday, I was very excited.

This is a 3 tier cake. The bottom portion was actually 2 tiers of the same size. Each of the 3 tiers is a different flavour: the top is vanilla sponge cake with mango buttercream, the middle is green tea jaconde with yuzu buttercream, and the bottom is a chocolate cake with dark chocolate ganache.

Knowing how to make a cake and how to assemble is one thing, it's easy to learn nowadays with youtube. However, practicing is very important too. I have learned the hard way that my time management skills need to be polished, that a 3 tiered cake with 3 different flavours could not be done in 8 hours, let alone having enough time to set the buttercream in the fridge before traveling. I have learned that this size of cake takes 3 pounds of butter to make enough buttercream for masking the whole cake. I have learned that I should have prepare the cake board, tint all the icing for decoration in advance. I have also learned that it is pretty impossible to find a box big enough to encase the cake.

Lesson learned. Now I need another big event to put that into practice. Anybody volunteer?

Side order: what can you do with leftovers? Here's what I did:

Monday, March 28, 2011

Cake Me To Spring!

I haven't have exams or crits for quite a while now. I think the last one I did was when I stand in front of 4 professors and 40 classmates to present my oh-so-failure master project four years ago. Okay we are not going to talk about that right now. Let's change the topic.

So last weekend it was the last class of cake decorating 1 course I was taking at George Brown College. We were to design our own cake and decorate it within 2.5 hours. Even though I had the design sketched out and cake baked and ready to go, I couldn't go to sleep. I was so nervous that I kept dreaming of masking the cake and waking up numerous times during the night.  There's no reason to be nervous, I knew I am capable of delivering what was planned. Only if I could get some sleep.

So here it is, my work after a sleepless night, carrying a headache and shaky hands. Not bad huh? There's actually a handle for the flower basket but it just won't fit in the cake box so it didn't end up on the cake.


Isn't the bunny adorable? I couldn't wait till spring. This winter has been dragging on for too long. It's the end of March and we are still below freezing point. This is not even funny.

Follow bakerynumber7 on Twitter

Tuesday, February 22, 2011

Crunch Cake


Lesson learned: never trust any oven other than your own. I have learned this the hard way.

Last week I have divided the bacon pistachio cookies into 2, planning to bake half the batch at my mom's place for them to try. I could have baked them in my own oven and bring the finished cookies to her in an air tight container, but I was running out of time. I just had to cut the log up and place it in the oven. No big deal, right?

Wrong.

I had used my mom's oven quite often when I was still living with her. I knew that the oven has a tendency to burn things at the bottom.  I therefore took extra caution when baking my cookies: chose a light silver baking tray versus a dark non-stick tray, and put the baking tray closer to the top half of the oven. Then only after 10 mins in the oven the cookies are almost burned at the bottom. Sigh... Lucky I caught that on time, and then lower the temperature and flip the cookies over to finish the baking time. They are still edible, but not ideal.

So lesson learned, never trust someone else's oven, and never trust recipes blindly.


This weekend was my aunt's birthday and she had requested crunch cake. There is actually no cake in a crunch cake. The "cake" is actually made of egg white meringues. They are light, airy, crisp and crunchy, and surprisingly not difficult to make.


Strawberry Crunch Cake
Almond Meringue Layer
Adapted from George Brown College Recipe
For 1 - 3 layers of 8" meringue, with extra for a couple of mini meringues

Ingredients:
86g ground almonds
22.5g cornstarch
6 egg whites
341g sugar
1 tsp vanilla extract
1/2 tsp good almond extract

Method:
1. Draw 3 -8" circles on 2 pieces of parchment paper. Flip over and place it on 2 baking trays. Preheat your oven to 275F to 300F.
2. Blend together ground almonds and cornstarch, set aside.
3. Whip egg whites to a thick foam, slowly add the sugar and continue to whip until it becomes stiff peaks.
4. Fold in vanilla and almond extract.
5. In 2 to 3 batches, fold in the ground almond mixture. Make sure there are no lumps or big air pockets.
6. Use a plain piping tip #5 or #6 (not the small Wilton decorating tips, but the big baking tips), pipe the meringue on the parchment in a spiral within the circles. When piping, the tip should be half an inch above the paper, and there should be no gaps between the spiral.
7. Bake for about 1hour & 15 mins until the meringue is dry. Keep an eye at around 1 hour to check on colour. Reduce temperature as necessary. Good meringues should be dry but a light cream colour.

Assembly:
When the meringues are cooled, pipe Chantilly cream with a star tip. Decorate with fruit. Lightly apply more cream and stack another meringue on top. Repeat with another layer and finish the top layer with fruit.
This cake is best to serve the day of assembly. The longer it sits, the higher chance of cracks to develop. You can bake the meringues up to 2 days ahead and keep it in an air tight container.

Saturday, February 12, 2011

Happy Valentine's


I made it!

Some time ago when I was cleaning up my bedroom I found my cake ideas notebook. The notebook was nothing fancy to brag about. In fact, it was an old copy book that I scribbled my random cake ideas on. One of the pages drew a flower pot cake filled with real roses. I put the book aside for years, kept thinking that something was wrong with this design, but couldn't tell what it was.

Years after my initial idea was born, I finally know why. I feel strongly against putting inedible stuff on or in a cake. Okay, you need to put dowels for a multi level cake, and you can argue that rose pedals are edible. But I am just against the idea of pulling out thorny rose stems out of a cake. Just not perfect enough.

Oh, if you haven't noticed by now, those aren't real roses. :)


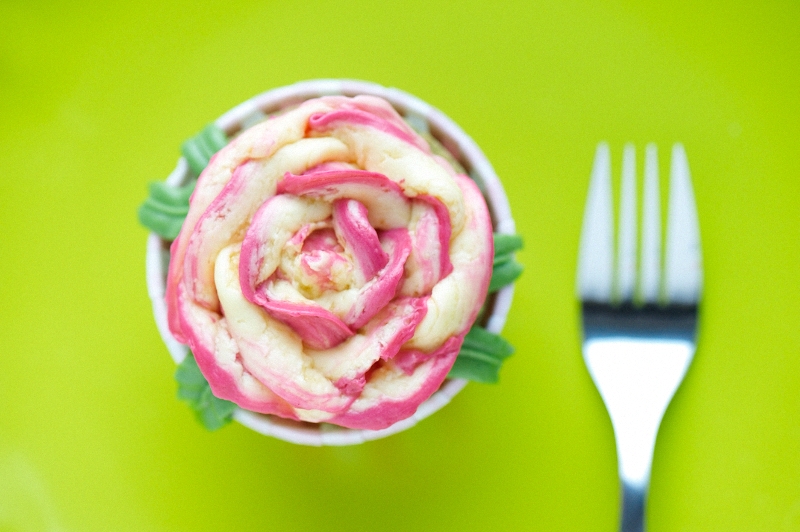
These roses are made out of white modeling chocolate. This pot of flowers are 99% edible. The 1% is the lollypop sticks that I used as flower stems.

The flower pot is filled made of white modeling chocolate, dark chocolate sponge, raspberry buttercream and dark chocolate ganache.


The most common medium for cake decorating is gum paste or fondant. But they don't taste great at all! I found a detailed recipe here for white modeling chocolate and I was overjoyed! That's it, that's what I am looking for!

Assembly was a long process, but I enjoyed it. First, cut out rounds of your chocolate sponge and layer with raspberry buttercream. I used 4 layers of sponge to get the height I wanted. Refrigerate until the buttercream is firm.

Next, you want to prepare some dark chocolate ganache and let it cool.  Using a hand held or stand mixer, whip until the ganache resembles heavy whipped cream. Cover the chilled cake stack with the ganache and smooth out all sides. Put it back in the fridge until it is set.

Meanwhile, start rolling your modeling chocolate. Roll it until it is 3mm. Use a tiny bit of cornstarch on the board to prevent sticking. Use small circle cookie cutters to cut out petals. You will need 9 discs of 1" (2.5cm) to 1-1/4" (roughly 3cm) to make a full blossom rose, and 4 to 5 discs for rose buds. Use a ball tip sculpting tool and a flower forming foam to slowly thin out the disc to the shape of rose petals. (Tips: Modeling chocolate are sensitive to temperature. If it is too soft to hold its shape, pull it to a marble slab or the fridge to firm it out. If it's too stiff and starts to crack on the edges, warm it up with the palm of your hand.) Form the center of the rose by rolling your first petal into a cone shape, then use 3 and 5 petals for the next layers. Open up the petals as you go along, and use the heat of your palm to warm up the edges to make it as life like as possible.

For green leaves, I used green tea powder to tint the modeling chocolate. Form different sizes of leaves using similar method to the rose petals and keep it in the fridge.

When you complete the roses, slightly cool them and stick it on a lollipop stick. Put them all in the fridge or leave overnight to set.

When the cake is completely cooled, roll out the modeling chocolate to a rectangle. Measure the height and circumference of your cake and cut a the chocolate to size. Take out your cake from the fridge and wrap it around the cake sides. It should be the same or slightly higher than the ganache. (You don't want the ganache "soil" to come out of the pot right?) Wrap it tightly around the cake and decorate the pot as you wish. I put a pink bow around the top as flower pots usually have a heavier lip. Put the cake back in the fridge until your roses are ready.

Using green craft tape, wrap the parts of lollipop sticks that is going to expose. Trim off excess sticks to get some height variations. Arrange the roses and leaves on the flower pot and you are done!

These chocolate roses actually taste pretty good. Maybe next time I am going to tint my rose petals with freeze dried strawberry powder for some added flavour and colour.

Happy Valentine's day everyone! Have a sweet one!


Sunday, November 21, 2010

Friend or Foe


It's Auntie D's birthday and mom asked me to prepare a cake. For some reason I had ginger flavour in my mind. It's the Asian ginger, not the powdered ginger use in ginger bread man. What a weird idea I had!


This is what I finally came up with - ginger bavarian cream with lemon mousse. It was an interesting combination of flavours. Fresh grated ginger juice gave the bavarian cream a nice subtle kick. The sweetness of the cream was balanced out by extra tangy mousse. I did some research and found out that fresh ginger contains an enzyme that retards gelatine to set. I have juiced a piece of ginger the size of a palm, boiled and reduced the juice to about 2.5 tablespoons and add to the bavarian cream mixture.  I was praying for the mixture to set and it did!

The lemon mousse I adapted from Jamie Oliver, reduced majorly on the sugar to get the tangy flavour.

Extra tangy lemon mousse
• 135g caster sugar (reduced from 185g)
• 3 large eggs, separated
• juice and grated zest of 2 lemons
• 3 tsp powdered gelatine
• 200ml 35% whipping cream (reduced from 300g)

Whisk the sugar and egg yolks together in a large bowl until pale and thick. Whisk in the lemon juice and zest. In a small bowl, combine 100ml boiling water with the gelatine and whisk until it dissolves, then add to the yolk mixture. In another bowl, beat the cream until soft peaks form, then fold into the yolk mixture. In yet another bowl, whisk the egg whites until stiff peaks form and fold into the cream mixture. Transfer to a clean bowl and refrigerate until ready to use. Pipe with a pastry bag into the middle layer of the cake.

Sunday, November 14, 2010

A Sexy Cake


I just love this cake! Velvety smooth yuzu buttercream enveloping a moist green tea genoise, crystalized almond to add crunch and decorated with yuzu glaze and white chocolate curls. The tone on tone cream colour outside looks so sexy hiding the surprising cross section of vibrant green.


Buttercream has quite a long defrosting time. It just won't taste good until it comes to room temperature. Due to the high ratio of butter, the texture resembles very much like cold butter. I wouldn't imagine anyone would like to eat cold butter when the texture is hard and brittle and it tastes dull - well maybe except sandwiched in a pineapple bun. Generally buttercream will take at least an hour to come to room temperature; and therefore making it perfect for travelling. When made properly, all parts of the recipe should be cooked and save to eat after a few hours at room temperature.

I have refined the yuzu buttercream recipe by taking an extra step to sieve through the yuzu syrup before adding into the buttercream. Since the zest is not going into the buttercream I have added another tablespoonful of syrup and the result is a little bit sweeter than I would prefer. Next time I would cut down the sugar to 60g. You can find the recipe here.


To kick up the genoise a notch, I reserved a teaspoon of chopped yuzu zest from the buttercream and added to the cake. That extra tiny bit added intense flavour and tied perfectly with the cream.

Friday, September 17, 2010

Chocolate Mochi Cake


Since I loaded up with my stock of Giradelli cocoa powder from SF, I need to use up my old stash in order to open up the new can. I picked a recipe online from Petite Chef, checked my barely empty fridge that I took effort to empty out before my trip, and started to go for it. I have changed a coconut milk to condensed milk as that is what I have got. It worked! So here is what I have done.


4 Tablespoons of butter, softened
1/2 cup sugar
1 egg, lightly beaten
1/4 C dutch-processed cocoa powder
2.2 oz. mochiko (sweet rice, or glutinous flour)
1/2 teaspoon baking powder
6 tablespoons evaporated milk 
 I have used a silicon mini muffin mold so there is no need to spray and prep the pans.
Preheat the oven to 350 degrees C.

Cream butter and sugar together with a hand held mixer. Add egg to incorporate.
Sieve together cocoa powder, mochiko and baking powder. Add the sieved dry ingredients to the butter mixture in 2 batches and mix with the mixer until just binded. Add evaporated milk and mix until just incorporated.
Divide batter equally into 12 mini muffin tins and bake for 18 minutes. (A few more minutes for a silicon pan) Cakes should spring back with a finger test. Rest for 5 minutes in the pan before demolding.

Friday, August 27, 2010

In Disguise


Sometimes what you see is not what you get.

The same applies to daddy's birthday cake.

It might look like a strawberry charlotte, but it's not.

Maybe it wanted to be a strawberry charlotte, that's why it was covered in strawberry.


No, this is a mango charlotte.


I had no idea why I arranged to meet up with my friends on Wednesday night, when clearly I need to make a cake for Thursday. I needed to make something that is not labour intensive, and I can make part of the cake ahead of time. I decided to make a charlotte as I can bake the cake on Tuesday night, freeze it, then make the mousse quickly on Wednesday night after dinner. The plan was to make strawberry mousse, but it was getting late and making seedless strawberry puree was not an option. I opted out and changed my mind to make mango puree instead.


I was looking for a recipe for ladyfingers online and I found one from Le Cordon Bleu.  The recipe seems easy but I couldn't figure out how to get 6 tablespoons of icing sugar on top of the batter.  I had to stop at 2 tablespoon, wait for 5 minutes, then sprinkle 2 more tablespoons over the top. It is just impossible to get 6. The overloaded sugar helped create a slightly crunchy surface, but it also melted during baking and sat between the ladyfingers. It made curving the cake difficult. Next time I will only sprinkle 2 tablespoons before baking and sprinkle the other 2 after they come out from the oven. That way the cake surface should stay dry and crunchy.

Saturday, August 21, 2010

In Search for Perfection


I have been using fresh fruit and blend my own fruit puree for my cakes so far. This was the first time I use store bought fruit puree. The verdit? I absolutely adore it! Just look at the colour of the mango mousse and compare to the fresh version I made, the yellow is so much more vibrant.

The bad thing is that the only places I found that carries this product only sells in 6 or 12 kilos. I certainly don't have the space in my freezer to keep all that fruit puree. But look at the cake! How can you not love it and get hooked to the product?

The search continues...

Monday, August 9, 2010

Food!!!


It was a weekend about food.

After last weekend's raising the kids in the daycare, I was so sleep deprived that I had put off baking for a whole week. The stress from my daywork only make my case more serious. However, by this Saturday I was all excited to bake again.

I woke up at 7am, a mere 5 hours of sleep after a I-don't-want-to-do-anything Friday night, thinking about making some bread. I must be crazy. I made some "tang zhong" ("65 degree" is another name) buns with Singapore shredded dried pork. I rolled the dough out to a long strip about 3 inches wide, brushed them with melted butter, spooned a layer of pork on top and rolled the dough up. I waited for a second proof and put them in the oven.

I thought I was clever to make good use of time and went out to the baking store for a short run in search for some specific items, only to know that a short ride of 5 mins turned to a 15 minute drive because of construction. Not only that the store did not have what I was looking for, when I got back to my kitchen the bread was a bit overcooked. I immediately took them out of the oven and brushed more melted butter on top to try to preserve the moisture.


Not to forget the Cakes: Classic to Modern class I had with Rita in the afternoon. We made St. Honoure with puff pastry, choux pastry, vanilla pastry cream and strawberries. It was the first time I make puff pastry. I have always known that the folding process is time consuming, but it never occurred to me that the baking part requires that much attention. Half way through the baking process, the pastry has to be taken out, flip over, press down and return to the oven. And when you have 6 big discs and 8 small discs to flip while the oven door was open waiting for you, the pressure was on. I burnt my left index finger during the flip. Ah well, not too bad, not to ruin my love of cakes!

The cake looks nice, not difficult to be a crowd pleaser when shown to your guests. The texture of the puff pastry could have been better though. I need more practice.

So what else?

When I say it's a weekend about food, I don't just mean Saturday, right?

Sunday started off with our usual weekly family gathering of brunch. We then had a 3 hour break and set off to the Taste of Danforth. Besides the usual Greek souvlakis, roasted corn and baklavas, there were a few rare finds like grilled lamb chops, quails, calamari and lamb liver wrapped with intestines. Since the weather was a mixed of rain and sun and cloud, it was not as crowd as usual and it was more fun to explore the stalls freely. It was a lot of fun going out with my cousins and we had a great time together. We should go back next year.

LinkWithin

Related Posts Plugin for WordPress, Blogger...